Cake = Yum
November 22, 2010
Before studying for my last final enslaves my attention for the rest of the night, I’m here to tell you the story of my final project; a delicious yellow cake with chocolate ganache frosting. Lets begin…
It was a dark and stormy night when the Blender removed the mixer from its shelf and began slaving away in the kitchen, creating a masterpiece. Lightning flashed, illuminating the Blender as the hunched over the scalding hot cake rounds, sweat dripped down his forehead, he was nearly finished. The cake had taxed him drastically thus far, he had been on the verge of defeat but he gathered his strength for the final steps…
Just kidding. It wasn’t that bad, it wasn’t bad at all. This cake was pretty fun to make, I especially enjoyed icing the cake which was something that required meticulous handwork and patience. Anyways, Cupcake was over so we could bake our cakes and trade off photographing each other’s creations. So I had someone to joke with and share the fruits of our labors.
I began by mixing the ganache frosting. First I set out my mise en place according to my sketch.
Next I heated the heavy cream until it began to simmer, this I poured over the chocolate in a mixing bowl. After two minutes of allowing the cream to slowly melt the chocolate chips, I began to whisk the chips. The whisking quickly turned the chunky brown mixture into smooth, nearly black, ganache. I set this aside and began my cake.
I yet again set out my mise en place and this time preheated the oven to 350 degrees. I mixed my dry ingredients together and added my butter and 3/4 cup of milk.
I separated six eggs, utilizing only the yolks. The yolks give the yellow cake its yellow coloring, without the yolks the batter is nearly completely white. To these eggs, I added 1/4 cup of milk and 2 teaspoons of vanilla extract.
If there was one thing that I was glad to have been blessed with for this project, it would have to be a standing mixer. The standing mixer was invaluable, it allowed me to clean and complete other tasks while mixing. I also didn’t have to worry about where to place the handheld mixer after mixing, which usually leads to dirty, dripped-on counters.
I next added my egg mixture to the relatively dry mix in the stand-up. My cake gained its color when I added the egg yolks, it adopted a beautiful shade of yellow. I began to drool. After beating for two minutes straight, I poured the batter into two 9 inch cake pans. I smoothed out the imperfections of the batter with small circles of a spatula.
I placed my two babies into the oven. It was hard letting go, but I knew they’d come back to me; grown up and even more delicious. After about 23 minutes I inserted a toothpick into each of the cakes.
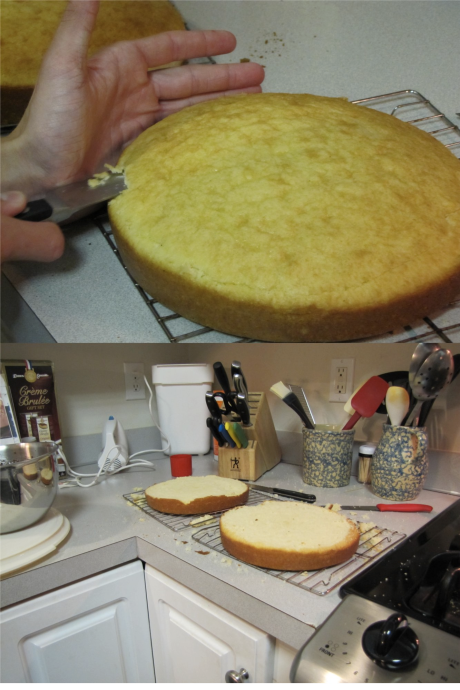
They were perfect, only a few soft crumbs came out on the toothpick. I pulled them out of the oven. After a few minutes I turned them out onto cooling racks and flipped them over so they wouldn’t split. The next part was pretty difficult, but not as bad as letting them cool completely! I took a knife to my two cake rounds. I hoped they would forgive me… It was worth it. After leveling their tops, I quickly consumed the cake scraps.
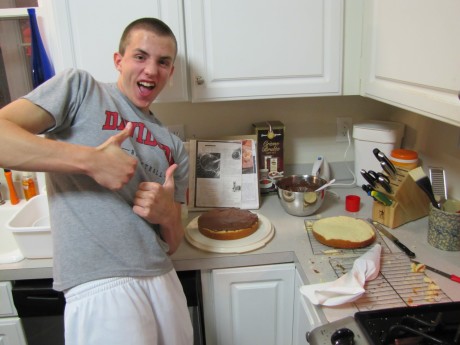
I chose one of my two sheets and placed it in the middle of a tray, on top of a dot of ganache frosting (which I had whipped up; creating light fluffy icing). I applied a generous heap of icing to the center of the cake and spread it to the edges, touching up with a piping bag so the icing would reach all 360 degrees of the cake. I then placed my other cake round on top, keeping in mind the curves and flat spaces that were unique to each cake. This gave me a completely level cake.
Gently I spread ganache across the cake, this layer would be my crumb coat and would keep cake crumbs in control, holding them out of my exterior icing.
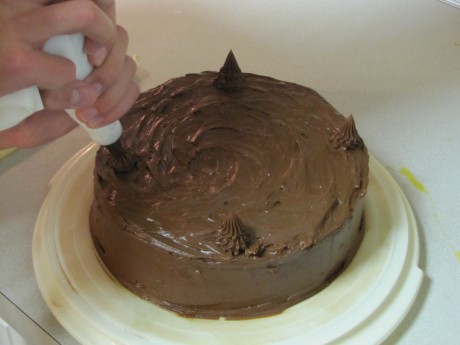
Then the fun began… I piled icing on the tops and sides. Using small semi-circles I spread the icing to the edge of the top of the cake and slightly over the sides. With a little spinning of the tray I was able to create smooth sides. I gave the top a small a small swirl design to make up for not being able to get the top completely smooth.
With a piping bag I decorated the top, through slight squeezes and pull offs I created the small tufts of icing that can be seen in the picture below.
With my cake completed I began the laborious process of cleaning the dishes… Of course you can never forget to prewash!
Now, with my story complete, it’s time I bid you farewell as I retreat to my lair to study for tomorrow’s exam…
-the Blender


The Cake looks amazing! I like the “crumb layer” of frosting. I never thought of doing that before, I always struggle with those crumbs throughout the whole frosting process! You do a great job and I love the enthusiastic posts!