Steak, always a favorite.
June 9, 2011
If you’ve read my post about lasagna, then you’ll know I used to be a very picky eater. One thing I would always eat was a nice big steak, and believe me, I still will. I love steak. There’s something about a juicy piece of steak, cooked just right (medium-rare, of course) that just makes my mouth water. My family absolutely loves steak too. When we hear that my mom is making steak for dinner, the house is FULL of excitement. When I saw that marinated flank steak was an option for our final project, I had to make it. And trust me, it was an amazing choice and I highly recommend it. Wanna learn how to make it?
Here are the ingredients:
1/2 cup soy sauce
1/2 cup cooking sherry
3 tablespoons honey
2 tablespoons sesame oil
2 heaping tablespoons minced ginger
3 to 5 cloves minced garlic
1/2 teaspoons red pepper flakes
1 flank steak
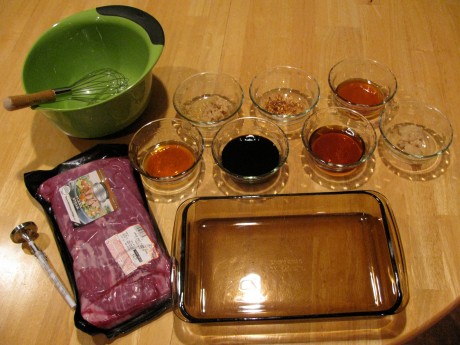
Once you have all of that set out in your mise en place, you can begin to prepare the marinade.
Combine all of the ingredients in a mixing bowl (Except the steak, keep that off to the side. You’ll use it later)
Take the steak out of the package, and give it a quick rinse.
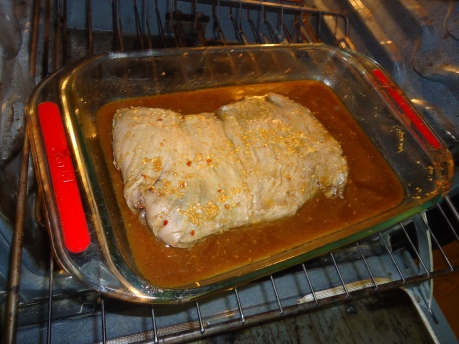
Put the steak in a glass dish, and pour on the marinade. Its probably a good idea to flip the steak and get some of the marinade on both sides. I used a spoon for this.
Then, cover the dish and put it in the refrigerator . The recipe suggests letting it sit for 3 to 6 hours, but I let mine marinate overnight.
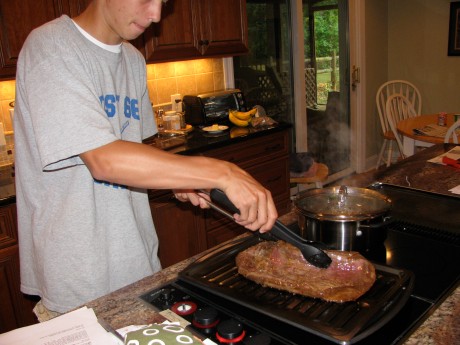
Now its time to broil your steak. Set your oven to broil, and place your marinated steak on a broiling pan. Position the pan around 3-4 inches below the heating element. Leave in the oven for 3-4 minutes, then give it a flip.
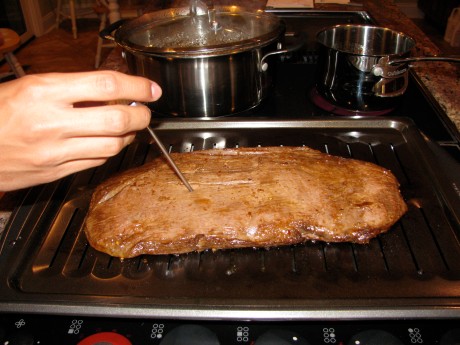
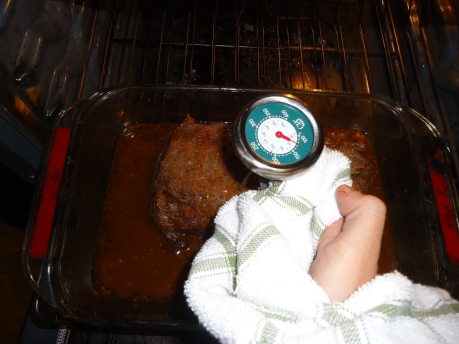
Leave it in the oven for another 3-4 minutes, then take it out and take the steaks internal temperature using a meat thermometer. Cook the steak to: 120–125 degrees F for rare, 130–140 for medium rare. I prefer flank steak to be cooked to medium-rare, just to keep it from getting too tough.
If the steak has reached a good internal temperature, put it on a cutting board and cover it with aluminum foil to hold in the heat and to keep the steak from drying out, and let it rest for 10 minutes. Letting the steak sit will let it keep cooking a bit longer and let the juices redistribute. Trust me, this step is definitely worth including.
When it’s time to cut the meat, make very thin slices, against the grain, and at a slight diagonal so that the slices are wide. Cutting against the grain makes the pieces more tender.
I made a sauce out of the leftover marinade, its pretty simple, but to be honest, I don’t think you need it. The steak is plenty flavorful already and the sauce is incredibly strong. Its not a very difficult, and some people might enjoy it, so its up to you! Here’s how to make it:
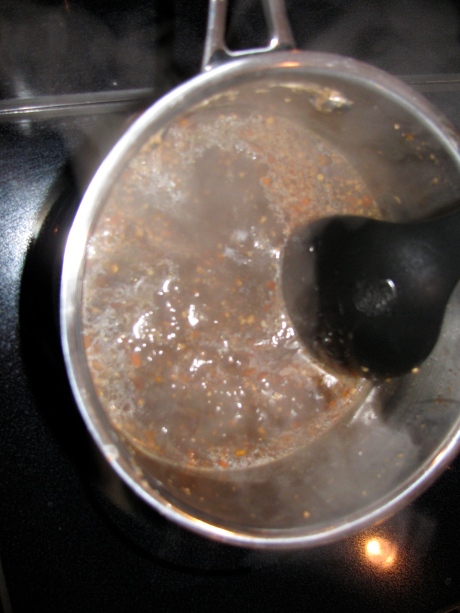
Before grilling the flank steak, strain the marinade into a small saucepan. Discard what stays in the sieve. Add ½ cup of water to the marinade. Boil the marinade while heating the grill for the meat AND add an additional 10 minutes. The point of boiling, obviously, is to take away any risk of bacteria from the marinade. Also, by boiling for ten to fifteen minutes, the sauce will reduce and slightly thicken. Then just spoon a little into a dish and use it as a dipping sauce for the meat.
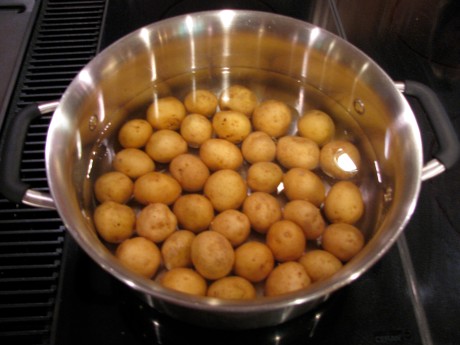
I also decided to make some potatoes with my steak. This was a very simple process that you can easily do while the steak is cooking. I got some small potatoes, put them in a pot and covered them with water. Then I put them on to boil and started preparing my steak. Once the water started to boil I put 20 mins. on the timer and left them alone. After the potatoes had boiled, I drained off the water and put them back in the pot with some butter so they could brown a bit. This is a pretty simple side that goes really well with the steak, but then again, I’ve always loved steak and potatoes, so you can have pretty much anything you want as a side.
After a little bit of stress from trying to cook everything all at once (as soon as I put the sauce on the stove I got overwhelmed, thats a lot of stuff to do all at on time) I finally had a meal prepared. Both myself, and my family loved the steak. It disappeared pretty quickly.
If you’re a fan of steak, I definitely recommend giving this recipe a try.
-Cupcake
The Johnson Family Favorite
June 9, 2011
When you think of “Johnson Family Dinner”, you think of steak. Simple as that. If you don’t immediately think steak, you should! Steak has been a Johnson family favorite for as long as I can remember! So as you can imagine, my family was THRILLED to hear that Marinated Flank Steak was one of the third trimester recipe options.
But of course, with our insanely busy schedules, I didn’t get to the grocery store until late monday afternoon, three days before the project was due. I figured that because the flank steak has to be marinated over night, Monday night was still an acceptable option! But of course my procrastinating did not pay of, because apparently everyone in Davidson was having flank steak for dinner that night as well and there was none left. Distressed, I asked the meat man behind the counter for any flank steak they might have in the back, but of course, they were all out. He did, however, suggest Skirt Steak as a very similar alternative. So with skirt steak in hand, I left Harris Teeter to begin my cooking extravaganza!
I began by mixing up the marinade! This required:
1/2 cup soy sauce
1/2 cup cooking sherry
3 tablespoons honey
2 tablespoons sesame oil
2 heaping tablespoons minced ginger
3 to 5 cloves minced garlic
1/2 teaspoons red pepper flakes
I mixed these ingredients in a glass dish (though a ceramic dish works as well), then put the rinsed steak in to marinate over night. The next evening, ready to cook some steak, I set the broiler to high, and let it preheat.
Once the broiler was ready, I set the steak in the middle and set the timer for roughly 6 minutes (The recipe suggests 3-5 minutes, but my mom refuses to eat raw meat, so a medium rare steak was not an option). After the time was up, I flipped the steak to the other side, and set the timer once again.
After the timer beeped for the second time, it was time to check the temperature. The recipe suggests 120-125 degrees F for rare, and 130-140 for medium rare. I let my steak cook a bit longer, so my steak ended up being toward the higher side of medium rare.
Once my steak was at ideal temperature, I let it cool for 10 minutes under a tent of tin foil before cutting, serving, and enjoying!
I decided to serve my steak with green beans (easy microwavable kind), and squash casserole, as requested by my mother. The squash casserole involved boiling squash, sautéing onions, and mixing various wet ingredients, all of which I learned to (almost) perfectly throughout this cooking class!
So in conclusion, skirt steak does work in this recipe (thank goodness!), this marinade is to die for, and the Johnson family had a glorious steak dinner once again!
Oriental Marinated Flank Steak: Delicious David
June 8, 2011
Ingredients:
1/2 cup soy sauce
1/2 cup cooking sherry
3 tablespoons honey
2 tablespoons sesame oil
2 heaping tablespoons minced ginger
3 to 5 cloves minced garlic
1/2 teaspoons red pepper flakes
1 flank steak
To begin: combine all ingredients in a glass or ceramic dish. Remove your flank steak from package and give it a quick rinse. Coat both sides of the meat with marinade and down the meat in your dish. Refrigerate for 3 to 6 hours at minimum, or simply marinate it overnight.
Broiling the flank steak: Preheat your broiler. Lay the meat on the broiling pan so that it will be directly under the heat and positioned to get an even distribution (you may want to put tin foil over your broiling pan as a buffer, to reduce cleaning time) . After 3–4 minutes, flip the flank steak over and broil the other side. After another 3-4 minutes, check the internal temperature with a digital thermometer. Cook the steak to: 120–125 degrees F for rare, 130–140 for medium rare. Be very careful to not overcook your meat, because it becomes unbelievably chewy.
Flank steak is best eaten medium rare. When the steak has cooked to the level that satisfies you, remove from the grill and place the steak on a cutting board. Cover with aluminum foil to hold in the heat, and to keep the steak from drying out, and let rest for 10 minutes.
To serve, make very thin slices, cutting against the grain, and at a slight diagonal if you want wider slices.
This recipe certainly came as a surprise to me, because initially I tried the recipe with red pepper flakes and since my tolerance to spice is basically nonexistent, I. This time around I left the pepper flakes out and all the other flavors became much more active in the dish. I enjoyed eating the steak and I found that white sticky rice is an excellent accompanying dish.
Quichilicious
June 8, 2011

Your final quiche should look somewhat like this.
I’ve never made a quiche before, and I think that I’ve only eaten one or two in my entire life. Of course, now that I’ve made this, I realize that will have to change; this was delicious! I cut my quiche into 6 pieces, ate two of them, and allowed my parents to have the rest. While in my household there are enough people to eat it quickly, if you make this just for yourself, you can always save a few pieces for later. Just pop the slice in the microwave for 20 seconds and you’ll have a great snack!
Ingredients:
Pillsbury Piecrust (you can always make your own crust, however if you’re in a hurry any sort of frozen crust also works)
Fillings:
1 tablespoon olive oil
2 medium onions, chopped
salt and black pepper
1/2 cup fresh chives, basil and thyme (any sort of herbs would work, these are just the ones that I chose to use)
4 large eggs
3/4 cup heavy cream
8 ounces asiago and cheddar cheese blend, grated

My blend of cheeses. Yes, the mouse-shaped grater is essential.
Directions:
First cook the pie crust by following the directions on the box. The best thing to do would be to cover the pie with parchment paper and then fill it with pie weights or pinto beans, however, if you’re like me and you find that you don’t have either of these, you can always just use a fork to poke holes in it.

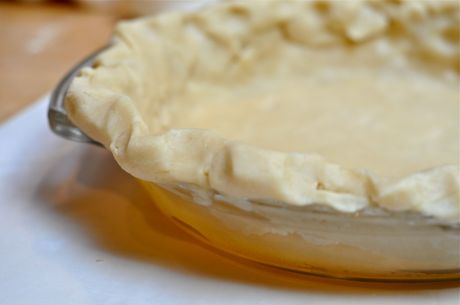
Do you see what's wrong? The crust isn't folded over the edge of the plate.
Also, remember to fold the crust over the edge of the pie plate! I forgot to do this and so by crust shrunk and became a lot more difficult to fill, so please learn from my mistakes and put the crust over the edge.

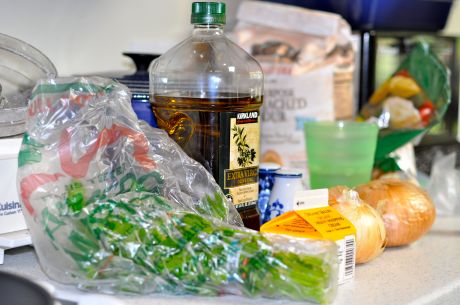
Remember that fresher onions are stronger than store bought ones.
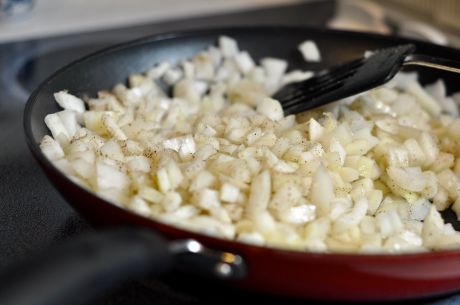
While the crust bakes would be a great time to work on the filling. Heat 1 tablespoon of olive oil in a large skillet over medium-low heat and add the onions and 1/2 teaspoon of both salt and pepper. Stir occasionally until soft (5 to 7 minutes). Stir in the herbs that you are using.

Sauté! Sauté!
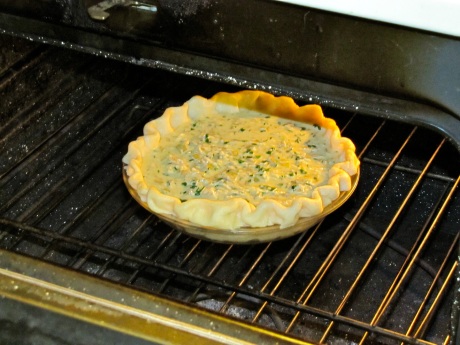
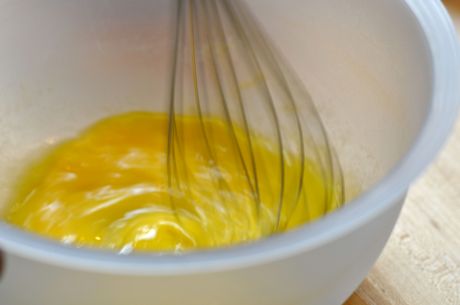
Whisk together the eggs and 1/4 tablespoon of salt. Stir in the onion mixture and cheese. Pour this mixture into the crust, and bake at 375 F until a knife inserted in the middle will come out clean. This should take about 15-20 minutes (mine took about 23 minutes, but every oven is different).

A simple salad is a great and easy side dish.
While your quiche is baking, you can always prepare a simple salad to have as a side! I used some iceberg lettuce and baby spinach, then mixed in some mushrooms and drizzled it with a garlic dressing.
-Popsicle!

And your final result! Yum!
Crazy for Quiche
June 7, 2011
Hey guys, so as many of you may know, I am graduating from Woodlawn School in just two days. This post, in fact, is the last piece of work I will ever do in high school at Woodlawn! It is a very bittersweet moment for all of us who are graduating. On Saturday I realized that this was the last weekend ever before summer. It was a perfect day to make a Quiche for my family for dinner! I don’t want to admit this but I didn’t used to like Quiche as a child. However, when I tried this one, I completely changed my mind. It was so delicious and bursting with flavor! I could not believe that I had been opposed to this growing up. I guess I must have been crazy back then.
The Ingredients needed are as follows: (Yields 1 Quiche)
To make the crust you will need:
* 2 cups flour
* 1 teaspoon salt
* ¼ cup cold shortening (butter works too)
* ½ cup cold butter, chopped
* 4-5 tablespoons ice cold water
* 1 egg and 1 teaspoon heavy cream for egg wash
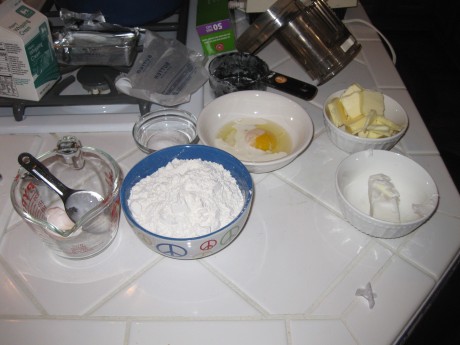
First, pre-heat the oven to 425 degrees Fahrenheit. In order to make the crust, pulse the salt and flour together to combine. Add scoops of shortening and pulse until the mixture has the texture of course sand, about 10 seconds. Add in chunks of butter and pulse until butter pieces are no larger than small peas, about 10 pulses. Add minimum amount of water and pulse on low. If dough remains crumbly and doesn’t come together, add another tablespoon of water. Add as little as is required to enable the dough to be rolled into a ball. Form the dough into a disk, wrap in plastic, and refrigerate for 20-30 minutes (or you can just put it in the freezer for 10 minutes).
Roll the disk of dough out to around 2 inches larger than your pie plate and transfer it, situating it in the plate. Fold excess dough around the edges and crimp, trimming where necessary. Blind bake the crust by covering it with parchment, filling it with pie weights or pinto beans, and baking four around 20 minutes. Remove the paper and weights and bake another 5 minutes.
Making crust is very satisfying. At first when its just the flour, salt and butter together it does not seem possible that dough can be made from that concoction. However, when you add a little bit of water its like magic! Somehow the water makes it all stick together and form real dough. It’s a pretty amazing thing to watch if you ask me!
Once the crust was crimped and perfectly in place it was time to add the filling (definitely my favorite part of the whole thing)!
For the filling you will need:
* 1 tablespoon olive oil
* 2 medium onions, chopped
* salt and black pepper
* 1 cup fresh, flat-leaf parsley, chopped
* 4 large eggs
* ¾ cup heavy cream
* 1/8 teaspoon ground nutmeg
* 8 ounces Italian cheese blend, grated
If you want to add a nice side dish to the quiche there is a simple salad that compliments it very well:
* 2 cups mixed greens
* olive oil
* lemon juice
Heat the oven to 375 degrees Fahrenheit. Heat 1 tablespoon of the oil in a large skillet over medium-low heat. Add the onions and ½ teaspoon each of salt and pepper and cook, stirring occasionally, until soft, 5 to 7 minutes. Stir in the parsley.
In a large bowl, whisk together the eggs, cream, nutmeg, and ¼ teaspoon salt. Stir in the onion mixture and the cheese. Pour the egg mixture into the crust. Bake until a knife inserted in the center comes out clean, 15 to 20 minutes. Let sit for 5 minutes. Drizzle the greens with olive oil and lemon juice to taste and season with salt and pepper. Serve with quiche.
I don’t know about you but I LOVE the smell of onions cooking. Let me just tell you, when I was cooking these onions, boy did they smell wonderful. Along with the smell, the sound of the sizzling is pretty freaking awesome too. It makes me feel like a professional chef cooking something really important.
Once I added the rest of the mixture to the onions it was truly starting to come together. I poured it into the crust and finally it was time to put in the oven!
I anxiously waited as the Quiche was cooking. Waiting it one of the hardest parts about cooking. If fact, it is oftentimes one of the hardest things about life. I feel like I am always waiting for something whether it is for my cookies to be ready or to start college, or for my birthday or even for exams to be over and summer to be here.
As I was sitting there waiting I began to think about all my amazing memories, friends and teachers I have had a Woodlawn. I will truly miss this next year and can’t wait to come back a visit for reunions. Suddenly this Quiche cooking craze had turned into a trip down memory lane. Thankfully the timer went off right before I got too sad (I will save that for graduation) and it was eating time!! My whole family could not wait to dig in!
The verdict… It was a success! It was delicious and I will definitely be making it a lot in the future. I can’t believe that highschool is over already. I can’t wait to start cooking in college, thats for sure!
This is Senior, Sophia Pizzeria, signing out forever. Happy cooking!
(Recipe by: Real Simple)
Quiche Deesh.
June 7, 2011
Hey yo. It’s Icebox Isaac signing in.
Life is tricky. My final days of high school are closing in and all I can think of is the past. It’s like the current weeks aren’t even happening. Memories are what keep me motivated. That and the heat.
Now that graduation is all of two days away, you would think that the stress level would be decreasing right? Wrong. That is indeed not the case as my life is so clearly telling me. My family came in town over the weekend for the big event Wednesday which has only added to the pile of rubble that is my sanity. But because they are here, it was the perfect time to do some good ole cookin’. And this quiche never disappoints…it’s a personal fav. In 1982, Bruce Feirstein wrote a novel called Real Men Don’t Eat Quiche and I could not be more against such a statement!
My grandfather tells an awesome story of how when he was in the war, their favorite thing to prepare was quiche. So really, such a statement as previously mentioned is utter lies!
Ingredients:
Crust:
- 2 cups flour
- 1 teaspoon salt
- ¼ cup cold shortening
- ½ cup cold butter, chopped
- 4-5 tablespoons ice cold water
- 1 egg, 1 teaspoon heavy cream for egg wash
Filling:
- 1 tablespoon olive oil
- 2 medium onions, chopped
- salt and black pepper
- 1 cup fresh flat-leaf parsley, chopped
- 4 large eggs
- ¾ cup heavy cream
- 1/8 teaspoon ground nutmeg
- 8 ounces Italian cheese blend, grated
Directions:
Preheat oven to 425ºF. To make the crust, pulse flour and salt together to combine. Add scoops of shortening and pulse until the mixture has the texture of coarse sand, about 10 seconds. Add in chunks of butter and pulse until butter pieces are no larger than small peas, about 10 pulses. Add minimum amount of water and pulse on low. If dough remains crumbly and doesn’t come together, add another tablespoon of water. Add as little as is required to enable the dough to be rolled into a ball. Form the dough into a disk, wrap in plastic, and refrigerate for 20-30 minutes (for our purposes, we will chill in the freezer for about 10 minutes).
Roll disk of dough out to around 2 inches larger than your pie plate and transfer it, situating it in the plate. Fold the excess dough around the edges and crimp, trimming where necessary. Blind bake the crust by covering it with parchment, filling it with pie weights or pinto beans, and baking for around 20 minutes. Remove the paper and weights and bake another 5 minutes.
Heat oven to 375ºF. Heat 1 tablespoon of the oil in a large skillet over medium-low heat. Add the onions and ½ teaspoon each of salt and pepper and cook, stirring occasionally, until soft, 5 to 7 minutes. Stir in the parsley.
In a large bowl, whisk together the eggs, cream, nutmeg, and ¼ teaspoon salt. Stir in the onion mixture and the cheese. Pour the egg mixture into the crust. Bake until a knife inserted in the center comes out clean, 15-20 minutes (or more–it took me like 35). Let sit for 5 minutes.
A ‘Royal’ Breakfast
June 4, 2011
EGGS BENEDICT
Hey kids. It’s Icebox Isaac signing in.
Ok so this may be a little late but I’m going to tell you about a certain breakfast I had on Friday, April 29th. You may think I’m silly. You may think I’m ridiculous. But I have a GOOD TIME.
It began with my mother prodding my arm at five in the morning to tell me that it was indeed time. She said that Prince William and Harry had just arrived at the Westminster Abbey, and that I needed to come downstairs pronto to begin the festivities. She had on a large purple brimmed hat and in her hand she held a British flag. I proceeded to shoot up out of my sheets and pull my top hat off the shelf to bestow upon my head (I kid you not). I had my own royal procession down the stairs and joined my mother on our big red couch. There she served me breakfast tea out of our fanciest china as we watched royalty drive through England to get to the ceremony.
Ok so the royal wedding between Kate Middleton and Prince William was a very big deal to my mother and I. She watched Di and Charles get married in 80’s and she was going to be darned if we didn’t get up early and watch this one! After about an hour of processionals and hat judging we began to get hungry, so we decided to cook up the most British thing we could thing of: Eggs Benedict. I got out the cookbook my ex-boyfriend so generously gave me last Christmas and got crackin’.
Here’s the delicious recipe for this special breakfast treat:
Ingredients:
- 4 poached eggs
- 1 recipe Mock Hollandaise Sauce (see below)
- 2 English muffins, split
- 4 slices Canadian-style bacon

- Cracked black pepper
Directions:
- Prepare the poached eggs. (Recipe for that can be found from a previous Woodlawn Kitchen post found by clicking here.)

- When prepared, set the eggs aside and keep warm while making sauce.
- In a small saucepan combine 1/3 cup dairy sour cream, 1/3 cup mayonnaise, 2 teaspoons lemon juice, and 1 teaspoon yellow mustard. Cook and stir over medium-low heat until warm.
- Preheat boiler. Place muffin halves, cut sides up, on a baking sheet. Broil 3-4 inches from the heat about two minutes or until golden brown. Top each muffin with a half slice of Canadian bacon; broil about 1 minute more or until bacon is heated.
- To serve, top each bacon-topped muffin half with an egg. Spoon Hollandaise Sauce over eggs. Sprinkle with pepper.
- Enjoy!
loveiceboxisaac
WALDORF SALAD RECIPE
Hey yo. It’s Icebox Isaac reporting for duty.
As I prepare for the summer and all the magical adventures it bestows, I must begin to prioritize and organize the things in my life. As June is already well upon us, it has come to my attention that it is beach season: therefore I must look good. Therefore I must stop eating junk food and start going to the gym. Not only is it beach season, but I am also in the company of the Davidson Community Players’ production of ‘Ragtime’ which opens in around two weeks. I am playing the role of historic icon and illusionist Harry Houdini, which presents itself with lots of intriguing challenges and pieces that I have to work through (including hanging upside down in a straight jacket). I was not too worried about the whole ordeal until I had a nice chat last month with the costume designer, where he informed that, true to real-life Houdini, I will be skimpily clad and my upper body will be fairly exposed to enhance different character developing aspects of the show. When this news hit my ears I’m fairly certain the sirens in my head could be heard for leagues. The little people in my head started to shout: “MAYDAY MAYDAY,” and they systematically began aborting ship.
Just kidding.
No, but really, this was a shock to me, and I realized I had to do something about it. So to get to the point of this post, I have been making myself salads. This Waldorf Salad was particularly delicious. Let’s talk about the details.
Ingredients:
- Four cups chopped apples and/or pears
- 4 teaspoons lemon juice
- 1/2 cup chopped celery
- 1/2 cup chopped walnuts or pecans (I prefer walnuts because they taste yummy and because it sounds like Waldorf)
- 1/2 cup raisins, snipped pitted whole dates, or dried tart cherries (I just had raisins)
- 1/2 cup seedless green grapes, halved
- 2/3 cup mayonnaise (I used low-fat, which is much better for you but probably doesn’t taste nearly as good…your choice)
Directions:
In a medium bowl toss apples/pears with lemon juice. Stir in the celery, nuts, raisins, and grapes. Stir in mayo until combined. Serve immediately or chill for up to eight hours. Enjoy!
Put That Biscuit In My Basket!
June 4, 2011
CHEESY DROP BISCUITS WITH GARLIC BUTTER (OR APPLE BUTTER)
I’ve always had a moral dilemma with most biscuits. The moral dilemma is this: they are always too flaky. I remember as a small child being whisked into the depths of the grease pit they call the ‘Bojangles’ and always leaving full, yet slightly unsatisfied. The chicken tenders: perfect. The fixin’s including (but not limited to) greenbeans, macaroni, and season fries: to die for. But the biscuits. Those biscuits. As a child I remember how funny they made my mouth feel upon putting the yellow morsel into my mouth. It was not until I aged a decent amount that I realized it was a greasy film penetrating the very core of tongue and the buds nestling upon it. For me, biscuits have always been a moral dilemma.
But then I learned facts. The fact is this: there are more than one kind of biscuit. That’s right! It was not until I stepped into the biscuit lesson in the Woodlawn Kitchen that I realized such a notion. The biscuit recipe I am about to share with you is that of a ‘drop biscuit,’ by far the most delicious section of the stuff. They are wetter because they contain more liquid and they are almost like a batter. They have a course texture and appearance, making them also much more elegant to look at. Here we go.
Ingredients:
1 cup of original Bisquick
1/3 cup milk
1/2 cup of shredded Cheddar cheese
1 tablespoon butter, melted
1/8 teaspoon garlic powder
apple butter (optional)
Directions:
-Preheat the oven to 450 degrees Fahrenheit.
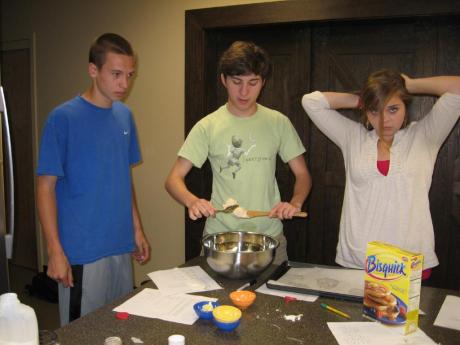
-In a bowl mix Bisquick and the cheese. Then add milk.
-Stir with a fork (to avoid the cheese sticking to a spoon) until soft dough forms.
-On a lined cookie sheet, drop the dough by five to six spoonfuls about 2 inches apart.
-Bake 8 to 10 minutes or until golden brown.
-In a small bowl, mix butter and garlic powder until well mixed: brush on half of warm biscuits before removing from cookie sheet.
-Serve half with garlic butter and half with apple butter
-Enjoy!
loveiceboxisaac
Hugs and Quiches, Woodlawn. It’s Been Real.
June 4, 2011
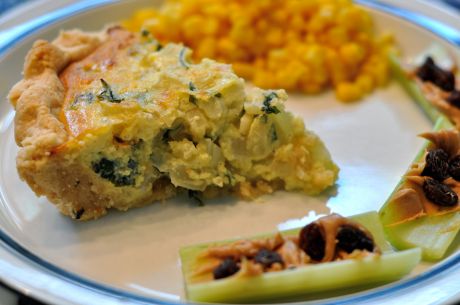
This quiche will rock your world. Not even an exaggeration. Also, don't forget the ants on a log. It's a classic.
Some things in life are simply hard to believe. Like…
-the fact that it is somehow June 3, 2011—only five days before my high school graduation,
-the forecast of 100º for this coming week (Get me outta hurrr!),
-the fact that I just made the world’s most spectacularly tasting quiche in less than two hours and devoured it in approximately two minutes
-and realizing that I have spent the last seven years at Woodlawn School and that it has truly made me who I am today.
Moving on is hard. I’m truly going to miss screaming at my brothers to wake them up in the mornings, strolling (more like struggling) down Woods Hall with eight textbooks, soaking up the sun in months like March and April, and calling each student at school by name.
Don’t get me wrong—I am ECSTATIC about going to college. Every day, my mind wanders from the class material that I should be studying to thoughts of my future roommate, the winter wardrobe in which I need to invest, the organic garden in Vermont, and the gallons of maple syrup that I will be swimming in every morning at breakfast. I have multiple countdowns on my dashboard and in my room that remind me how far away (yet how close) move-in day is.
But it’s complicated, you know? Leaving the small town that you’ve grown up in, recipes that your mother has cooked on extra-stressful days, supportive church and school communities, your favorite strawberry-banana smoothie from the local coffee shop, and that comfortable bed and privacy of your own room is bound to be hard. It’s kind of daunting, don’t you think? Well maybe you can’t relate to every single one of those examples, but those are the kind of thoughts scrambling around my brain during my last days as a high school student at Woodlawn.
Speaking of the word “scramble,” I usually scramble my eggs, but today I tried something new (How’s that for a transition, huh?). Just like I’ll be stepping out of my comfort zone in the fall when I head off to college, I took a step out of my egg-scrambling comfort zone today and decided to use my eggs for a basic quiche recipe. And believe me, if my transition from high school to college goes as smoothly as my transition from scrambled eggs to quiche, I will be completely, without a doubt, the most happy (and well-fed) girl in the world. This quiche was flippin’ sa-weet. It was hands-down, 100%, the BEST quiche I have ever tasted devoured in my life. I don’t think the photos do its magical taste justice.
Give it a go, and you will NOT be disappointed. *Disclaimer: You will be disappointed when no quiche remains in your pie plate…
Basic Quiche
Makes One Quiche
Crust:
2 cups flour
1 teaspoon salt
¼ cup cold shortening
½ cup cold butter, chopped
4-5 tablespoons ice cold water
1 egg, 1 teaspoon heavy cream for egg wash
Filling:
1 tablespoon olive oil
2 medium onions, chopped
salt and black pepper
1 cup fresh flat-leaf parsley, chopped
4 large eggs
¾ cup heavy cream
1/8 teaspoon ground nutmeg
8 ounces Italian cheese blend, grated
Directions:
Preheat oven to 425ºF. To make the crust, pulse flour and salt together to combine. Add scoops of shortening and pulse until the mixture has the texture of coarse sand, about 10 seconds. Add in chunks of butter and pulse until butter pieces are no larger than small peas, about 10 pulses. Add minimum amount of water and pulse on low. If dough remains crumbly and doesn’t come together, add another tablespoon of water. Add as little as is required to enable the dough to be rolled into a ball. Form the dough into a disk, wrap in plastic, and refrigerate for 20-30 minutes (for our purposes, we will chill in the freezer for about 10 minutes).
Roll disk of dough out to around 2 inches larger than your pie plate and transfer it, situating it in the plate. Fold the excess dough around the edges and crimp, trimming where necessary. Blind bake the crust by covering it with parchment, filling it with pie weights or pinto beans, and baking for around 20 minutes. Remove the paper and weights and bake another 5 minutes.
Heat oven to 375ºF. Heat 1 tablespoon of the oil in a large skillet over medium-low heat. Add the onions and ½ teaspoon each of salt and pepper and cook, stirring occasionally, until soft, 5 to 7 minutes. Stir in the parsley.
In a large bowl, whisk together the eggs, cream, nutmeg, and ¼ teaspoon salt. Stir in the onion mixture and the cheese. Pour the egg mixture into the crust. Bake until a knife inserted in the center comes out clean, 15-20 minutes (or more–it took me like 35). Let sit for 5 minutes.
Recipe by: Real Simple.
Listen to me when I say that if you do not demolish one of these fabulous quiches tonight, you are truly missing out. The moist (but not too moist) egg filling meshes magically with the flaky crust and leads to a sense of heaven on earth all right inside your mouth. Even after eating a piece and a half of this quiche within the last three hours, I would easily go back for another piece of this magic. This is Saucy Sayre signing out for the last time. So I’ll say it one more time folks: Stay saucy, citizens.
